



export@cntjtent.com
+86 15613206703
When campsite operators, glamping resort owners and rental companies compare inflatable tents, the first figure they look at is capacity — "sleeps 2", "sleeps 4", "sleeps 6". That number tells you how many sleeping places a tent can technically hold. It does not tell you whether the space actually works for paying guests.
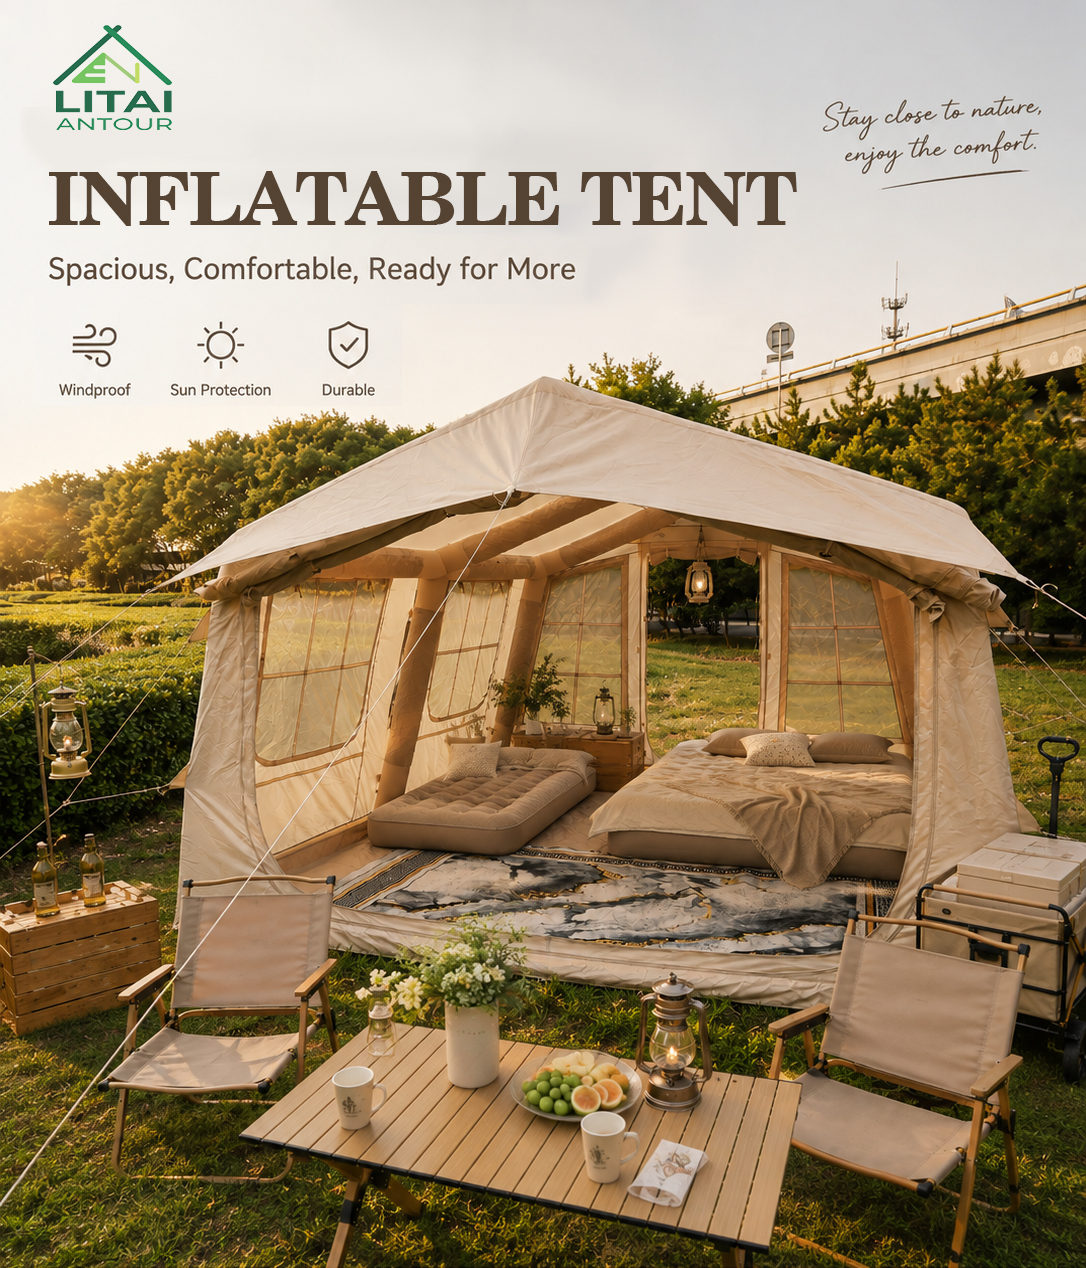
Two tents can carry the same capacity rating and feel completely different once a bed, a suitcase and two people are inside. Layout is what separates a tent guests tolerate from one they photograph and recommend. This guide walks through how to plan the interior of an inflatable tent properly — starting with beds, then walkways, storage and ventilation — and how to judge real usable space before you commit to a bulk order.
A capacity rating is usually a sleeping-places calculation, often based on people lying in rows with minimal personal gear. It rarely accounts for luggage, a bed frame, a walkway or somewhere to stand and get dressed.
There is a second factor specific to inflatable and air beam tents: the walls slope inward. The floor area is smaller than the external footprint suggests, and the space you can actually use while standing or walking is smaller again.
When comparing models, always ask for the internal floor dimensions measured at floor level, not the external footprint. For glamping and hospitality use, budget considerably more floor area per guest than you would for basic camping.
Beds are the largest single footprint in the tent, so they should be planned first. Everything else fits around them.
Leave clearance around each bed so it can be made without climbing over it, and so a guest can walk past someone sitting on the edge.
In every case, keep the door side clear. A bed placed directly behind the entrance makes the whole tent feel cramped and blocks the entry route.
Once the beds are placed, draw the walking route. This is the step most buyers skip, and it is the one that most affects how the tent feels.
Commercial guests bring more luggage than the capacity rating assumes. Plan for it deliberately:
For rental fleets, giving each guest a clearly designated storage spot noticeably improves the experience and speeds up housekeeping checks at changeover.
This is the most common layout mistake, and it directly causes the damp, stuffy mornings guests complain about.
Effective ventilation needs air to enter low and exit high. If beds, storage boxes or hanging organisers block either end of that path, airflow stops. As a rule, avoid pushing furniture flush against walls that carry vents, and keep mesh panels uncovered.
If you are specifying tents for a humid climate, treat ventilation clearance as a fixed part of the layout rather than something to work out later.
Here is a simple method to test a layout before ordering:
If the layout only works after you remove the aisle, the tent is too small for that occupancy — whatever the capacity label says.
If you are ordering for a campsite, glamping resort or rental fleet, layout decisions affect operations as much as comfort:
More than basic camping. A capacity rating that assumes sleeping bags in rows will feel cramped once real beds, luggage and a walkway are added. Always work from internal floor dimensions and subtract the sloping-wall area before judging.
Yes, and this is usually the best use of space — the outer edges are where headroom is lowest. Just keep the bed away from any vent in that wall, and check that the bed length fits the usable floor area rather than the overall footprint.
Two singles is generally the safer commercial choice. It accommodates couples, friends and colleagues, and it is easier to reconfigure. A double-focused layout suits properties that specifically target couples.
In most cases, yes. Pocket placement, hanging points, liner design and door configuration are common OEM/ODM adjustments. Discuss them before production rather than after.
LITAIANTOUR supplies inflatable tents, air tents and glamping tents factory-direct for campsites, glamping resorts, rental operators and distributors worldwide. If you would like help matching a layout and specification to your guest profile and climate, our team is happy to review your plans.
Email: export@cntjtent.com
Contact: Litai
Phone: 15613206703
E-mail: export@cntjtent.com
Whatsapp: +86 15613206703
Add: Tianjin Wuqing District entrepreneurial headquarters base c05